Brisket Cooking 101
You Can Do it
You’ve made it. You’ve cooked all the burgers and hotdogs you can, and now it’s time to graduate to the wild world of BBQ. What better place to start than one of the most iconic BBQ cuts of meat -- brisket. It’s not going to be easy, but the result is going to be worth every bit of effort you put in (and then some). Keeping the amazing end result in mind, we should say that cooking brisket is no small task. It involves trimming, smoking, wrapping, and resting -- even for experienced BBQ chefs, it can be an intimidating task. But don’t worry -- we’ve put together all the most vital information that you’re going to need to make an incredible smoked brisket. By the time you’re done, the illustrious title of Pitmaster won’t seem so far away.
Picking the Right Brisket
For many experienced BBQ masters, the ideal brisket can be folded in half. Raw brisket should feel flexible and floppy, not rigid or stiff. Flexibility in brisket is an indicator of the ideal balance between muscle and fat. You should also have thorough marbling in the entire brisket -- this fat will render into the meat as it cooks, creating a tender and succulent result. Lastly, the leaner part of the brisket (the flat) should be thick enough that it will cook at a similar rate to the fatter part (the point).
Trimming a Brisket
Any decent brisket from a butcher or a grocery store will have quite a bit of fat on it. Some of this fat should be kept on during the cooking process, as it will keep the meat moist and tender while the meat is smoked. That being said, you should trim most of it so your brisket isn’t excessively fatty. Trimming is a time-consuming part of preparing your brisket, especially for novice BBQ’ers. Ideally, you want to trim the fat cap down to about ¼ of an inch. From there, liberally thin out the fat wherever it seems too thick. Also, be sure to remove the silver skin from the bottom of the brisket. If you feel unsure about the process, we suggest following along with a tutorial video.
Seasoning the Brisket
Just about everyone has their own secret, special rub that is better than the rest. If that’s you, go for it. If you aren’t sure what rub to use, we suggest one of Camp Chef’s BBQ rubs. They’re consistent, reliable, and delicious. Be sure to thoroughly coat the brisket on both sides. If the seasoning doesn’t seem to stick, you can gently massage the rub into the surface. Be generous with the seasoning, but don’t go crazy -- you don’t want a layer of cakey rub covering the brisket.
Smoking the Brisket
Aside from eating, this is our favorite part of the process. When it comes to brisket, low and slow is the name of the game. Pellet grills are an ideal brisket smoking solution. Preheat the pellet grill to 250 °F or Hi-Smoke. Cook the brisket until you reach an internal temperature of 160 °F. We can’t say an exact cooking time, because the total cook time is going to vary depending on a variety of factors. We suggest that you constantly monitor the temperature, not the clock! But, as a general estimate, you can expect 10-15 hours total for an entire brisket.
The Stall and Wrapping
When you hit around 160 °F, your brisket will hit something called the “stall”. The brisket stall happens when the meat releases moisture, cooling down the brisket, and stalling the temperature for a couple of hours. At this point, just let the brisket continue to cook. The temperature will eventually start rising normally again. For the impatient grillers, you can use a trick called the “Texas Crutch”. To do this, wrap the brisket in foil or wax-free butcher paper. It will speed up the cooking by retaining moisture (and heat). This will also create a more tender and moist result.
Resting
When your meat probe is reading 190-205 °F, it’s time to let your brisket rest. Remove the brisket from the grill, and wrap it in aluminum foil (if you haven’t done so already). We suggest letting it rest for at least an hour. This will allow the juices to settle in the meat instead of being released when you try to cut it. Some Pitmasters even rest their brisket for two hours or longer.
Look for the Bark
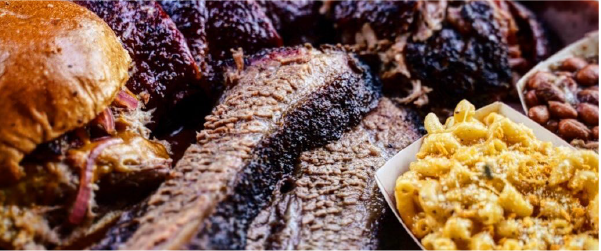
By the time your brisket is finished, it should have a dark, mahogany crust all over its outside. This is referred to as the bark. Cut the brisket into thin slices, against the grain. Now it’s time for the final test. Hold up a slice of the brisket. It should not fall apart under its own weight. But when you give it a gentle, light pull, the brisket should separate. If it passes this test, you’re looking at a perfect brisket.
Practice Makes Perfect
As with anything worth doing, practice makes perfect when it comes to brisket. Camp Chef Pellet Grills are a great way to help speed that process along. With Camp Chef’s Smart Smoke Technology, you can cook tender, juicy brisket every time. Simply follow this guide, and you’ll be well on your way to full-on Pitmaster status.