Reloading Rifle Ammunition

Rifle ammunition, in many ways, is loaded in the same way as handgun ammunition. And unless there is some kind of shift in the way metallic components are manufactured for rifle ammunition, we can expect the process to stay the same for a long time.
Although the loading processes are largely similar -- almost identical -- there are a few subtle differences. These differences are minor, but they do impact the end result.
Essentially, loading modern bottleneck rifle cartridges is a four-part process. It involves sizing/decapping, priming, powder charging, and bullet seating. Most steps are very similar to those that you’ll follow in handgun loading, while others are unique to rifle cartridges.
Powder Charges
One main difference is that powder charges in rifle cases tend to be much larger. As a result, the powder measure must be able to dispense bulky and coarse-grained propellants. With these coarse-grained powders, some users may choose to weigh each charge a few grains under the manual’s or manufacturer’s specified charge weight. From there, they will slowly add more grains to balance the scale. While this can slow things down, the result is reliable and accurate ammunition. This is often extremely important for rifle shooters.
Depending on the rifle or cartridge, you may require trimming every fifth or sixth reload. For full-powered loads, you’ll require even more regular trimming.
Neck Tension
Neck tension is also extremely important when working with rifle cases. It holds the bullet in place when loaded, and also assures consistent combustion of powder. For these reasons, be sure to pay proper attention to your expander plug. If the plug gives little to no resistance when seating bullets, it should be checked for proper diameter. Improper headspacing can also cause head separation, which is another reason to check your sizing die.
Bullet and Cartridge Length
Another place to be careful is with bullet and cartridge length. Overall improper measurements can lead to difficult or non-functioning chambering. If you are finding small dents in the shoulders of your bottleneck cases during sizing, you may be using too much lubricant.
Double-checking
Double-check everything you do after every step. When working, monitor each of your procedures carefully and log everything. When firing, check for signs of abnormal pressure or irregular firing. Flattened primers, hard extraction, and ejector markings are all causes for concern. Never start charging cases with the maximum loads. Always start at least ten percent below the recommended maximum, and work your way up from there.
If you ever see any problems, stop shooting immediately. Take your rounds home and use a bullet puller to empty the cases. Keep a record of what you have loaded and emptied. Maintain a three-ring binder for records to see how the firearm reacts to different powders and charge weights.

Step 1 - Inspect cases
As with pistol ammunition, the first step is to inspect all of the new cases for defects, debris, or damage. Mouth splits or irregularly-shaped case mouths are both common defects, but the sizing die will take care of this issue.

Step 2 - Lubricate cases
Slightly lubricate all of the cases sparingly before inserting them into the sizing die. Roll five or six on the lube pad at a time, and one by one insert them into your sizing die.

Step 3 - Lubricate case necks
Also lubricate the insides of the case necks. This will create an easier return out of the die. You can also use the carbide expander plugs instead of dies, which would eliminate this step entirely.

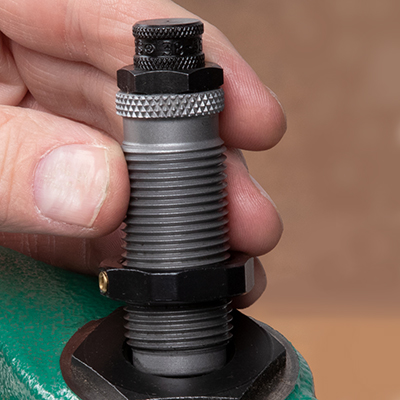
Step 4 - Insert sizing die into press
Insert the sizing or decapper die into the press. Adjust it according to the manufacturer’s instructions. Typically, you’ll need to screw this die into your press until it barely is touching the shellholder (when the ram is in its upright position).
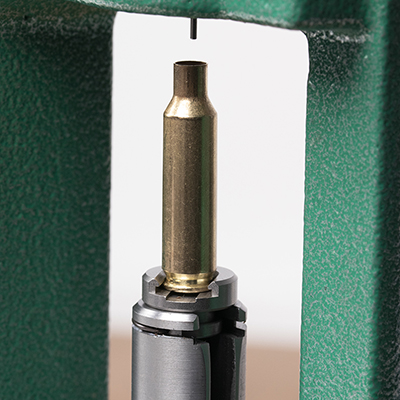
Step 5 - Insert case into shellholder
While making sure it is touching the rear of the holder, slide a case into the shellholder. It should enter the sizing die straight.

Step 6 - Raise case into die
Raise the cartridge case into the die. For full-length resizing, run it up completely. Any primer will be expelled from a previously fired case at this time. With a few turns of your cleaning tool, it should be simple to clean the primer pocket.

Step 7 - Clean all cases
Use a solvent to clean all of the cases. Alternatively, tumble them in a media powder before you proceed.

Step 8 - Check case for correct length
After sizing or resizing your case, check it for overall length against factory specifications.

Step 9 - Trim casing length
If your cases are past their factory-specified lengths, you’ll need to trim them back. You can either use a trim die or a case trimmer. A case trimmer utilizes a pilot to fit almost all rifle cartridges.

Step 10 - Chamfer inside casing mouth
After you’ve trimmed, chamfer the very inside of the case’s mouth.

Step 11 - Chamfer outside casing mouth
Do the outside of the case mouth and remove burrs by turning the tool around.

Step 12 - Select powder charge
Before loading your case, consult the loading manual to select the appropriate powder charge.

Step 13 - Insert primer into cartridge
With the press, priming is completed using the included primer feed.

Step 14 - Mount powder measure
Be sure to mount your powder measure on a solid shelf. The only powder that should be on the bench is the one you are currently using.

Step 15 - Charge powder measure
After making sure the powder reservoir is full, use the powder measure to charge a few grains below your chosen load.

Step 16 - Zero powder scale
If possible, work at eye level. Zero your powder scale and use the trickler to bring the charge up to your desired weight.

Step 17 - Verify correct powder charge
Use your scale to verify the correct powder charge for each case. Then, load each case with the appropriate charge. Proceed down the line until all cases are charged. After you’re finished, visually inspect the cases for proper volume.

Step 18 - Install seating die
Install the seating/crimping die to prepare for bullet seating.

Step 19 - Placed primed and charged case into press
Place a primed and charged case into the press, raise the case, and install the seater die. Do this until the crimping ring barely touches the case mouth. Unscrew it about ¼ of a turn, and manually tighten the lock ring.

Step 20 - Install bullet
Install the bullet by lowering the case back down. Ensure the bullet is straight.
Step 21 - Consult manual for overall cartridge length
Consult your loading manual to find the ‘overall length with bullet’. Raise the case and adjust the bullet seater stem until you have achieved this length. Use your dial calipers to verify the length. This is a good chance to make a dummy round -- one with no powder or primer -- and check it in your rifle for functionality. For hunters, we suggest making three or four, loading the magazine, and cycling each round.
Step 22 - Crimp bullet in cartridge
Turn the die assembly down until proper crimp is achieved. On the left, you see an uncrimped bullet. On the right, you will see a medium crimp. Crimping ensures that your bullet will not shift during recoil.